How to set the default printer – Navigating the complexities of printer management, this guide delves into the intricacies of setting the default printer, empowering you to streamline your printing workflow and optimize efficiency.
Unveiling the nuances of printer settings, we embark on a journey to discover the optimal configurations for cost-effective, high-quality printing, ensuring your documents make a lasting impression.
Identifying the Default Printer

A default printer is the printer that is automatically selected when you print a document. It is typically the printer that is connected to your computer via a USB cable or network connection.
There are several ways to identify the current default printer:
Command-Line Method
On Windows, you can use the following command in the Command Prompt:
“`wmic printer get name,default“`
On macOS, you can use the following command in the Terminal:
“`lpstat
d
“`
On Linux, you can use the following command in the Terminal:
“`lpstat
a
“`
Setting the Default Printer in Windows
Step-by-Step Instructions
Follow these steps to set the default printer in Windows:
- Go to the Control Panel.
- Select “Devices and Printers”.
- Right-click on the printer you want to set as default and select “Set as Default Printer”.
- Click “OK” to save your changes.
Illustrative Screenshots
| Step | Screenshot |
|---|---|
| Go to the Control Panel | [Image of Control Panel window] |
| Select “Devices and Printers” | [Image of Devices and Printers window] |
| Right-click on the printer you want to set as default and select “Set as Default Printer” | [Image of printer properties window] |
| Click “OK” to save your changes | [Image of Control Panel window with default printer set] |
Setting the Default Printer in macOS
To set the default printer in macOS, follow these steps:
Adding a Printer
- Click on the Apple menu and select “System Preferences”.
- Click on “Printers & Scanners”.
- Click on the “+” button at the bottom of the list of printers.
- Select the printer you want to add and click on “Add”.
Setting the Default Printer
- Click on the printer you want to set as the default.
- Click on the “Default” button at the bottom of the list of printers.
Changing the Default Printer on a Network

Changing the default printer on a network allows users to select a specific printer as their preferred printing destination. This can be useful in environments with multiple printers or when users need to print to a specific printer based on its capabilities or location.
To set the default printer, navigate to the Control Panel, select “Devices and Printers,” and right-click on the desired printer. Choose “Set as default printer” from the menu. Additionally, you may explore what is comfort print to enhance your printing experience.
By setting a default printer, you can streamline your printing tasks and ensure that documents are sent to the correct device.
To change the default printer on a network, users can follow these steps:
Network Settings
Access the network settings on your computer or device. This can typically be done through the Control Panel or System Preferences on Windows and macOS, respectively.
Locate the section for printers or printing devices and select the “Set as Default” option for the desired printer.
Printer Preferences
Open the printer preferences or properties dialog box for the desired printer.
Look for the “Default Printer” or “Set as Default” option and select it to make the printer the default.
Troubleshooting Default Printer Issues

Encountering difficulties setting your default printer? This guide will assist you in identifying and resolving common issues, ensuring seamless printing. Let’s dive into the potential problems and their corresponding solutions.
Hardware Issues
- Printer not detected:Verify that the printer is powered on, connected properly, and recognized by your computer. Check cable connections, try a different USB port, or consult the printer’s user manual.
- Printer offline:Ensure that the printer is turned on and online. Check for any error messages on the printer’s display or in the computer’s printer settings.
- Paper jams:Open the printer and carefully remove any jammed paper. Check for any torn or crumpled paper that may be obstructing the printing path.
Software Issues
- Outdated printer drivers:Install the latest drivers for your printer from the manufacturer’s website. Outdated drivers can cause compatibility issues.
- Conflicting software:Check if any other software is interfering with the printer. Disable or uninstall any recently installed programs that may be causing conflicts.
- Corrupted printer settings:Reset the printer’s settings to factory defaults. This can be done through the printer’s control panel or the computer’s printer settings.
Network Issues
- Network connectivity:Ensure that the printer and computer are connected to the same network. Check for any network outages or connectivity issues.
- Firewall blocking:Check if your firewall is blocking the printer’s communication. Temporarily disable the firewall or add the printer to the firewall’s allowed list.
- Incorrect IP address:Verify that the printer has a valid IP address assigned to it. Check the printer’s network settings and ensure it matches the network’s configuration.
Troubleshooting Checklist, How to set the default printer
- Check hardware connections and printer status.
- Update printer drivers.
- Disable conflicting software.
- Reset printer settings.
- Verify network connectivity.
- Check firewall settings.
- Contact the printer manufacturer or a qualified technician if the issue persists.
By following these troubleshooting steps, you can identify and resolve common default printer issues, ensuring smooth and efficient printing.
Setting the default printer is a simple process that can be completed in a few steps. However, if you need to delete a printer from your HP Smart account before setting the default, you can follow the instructions outlined in how to delete printer from hp smart.
Once the printer has been deleted, you can proceed with setting the default printer as per the initial instructions.
Setting the Default Printer for Specific File Types

When working with various file types, it can be convenient to set specific printers as the default for each type. This ensures that documents are automatically printed on the desired printer based on their file extension.
To set the default printer for specific file types, follow these steps:
Windows
- Open the Control Panel.
- Navigate to “Devices and Printers.”
- Right-click on the desired printer and select “Set as default printer.”
- In the “Printers” tab, click on the “File Types” button.
- Select the file type you want to associate with the printer.
- Click on the “Set as Default” button.
macOS
- Open the “System Preferences.”
- Click on “Printers & Scanners.”
- Select the desired printer from the list.
- Click on the “Options & Supplies” button.
- In the “Default Printer” drop-down menu, select the desired file type.
Below is a table with examples of how to set the default printer for specific file types in Windows and macOS:
| File Type | Windows | macOS |
|---|---|---|
| Adobe Acrobat Reader | Preview | |
| Word documents | Microsoft Word | Pages |
| Excel spreadsheets | Microsoft Excel | Numbers |
| PowerPoint presentations | Microsoft PowerPoint | Keynote |
Using Line to Set Default Printer
Line is a command-line utility that can be used to set the default printer on Linux systems. To use line to set the default printer, open a terminal window and type the following command:
lpadmin
-d
Where
For example, to set the printer named “HP LaserJet 4000” as the default printer, you would type the following command:
lpadmin
-d HP_LaserJet_4000
Once you have entered the command, press Enter and the default printer will be set.
Managing Multiple Default Printers

Having multiple default printers can be beneficial for managing different printing needs. It allows users to quickly switch between printers based on specific requirements, such as printing on different paper sizes, types, or colors.
However, managing multiple default printers can also pose challenges. It’s important to understand how to set up, switch between, and troubleshoot any issues that may arise when using multiple default printers.
Setting Up Multiple Default Printers
To set up multiple default printers, follow these steps:
- Go to the “Printers & Scanners” settings in Windows or “System Preferences > Printers & Scanners” in macOS.
- Click on the “Add a Printer” button.
- Select the printer you want to add and click on the “Add” button.
- Once the printer is added, right-click on it and select “Set as Default Printer”.
Switching Between Default Printers
To switch between default printers, follow these steps:
- Go to the “Printers & Scanners” settings in Windows or “System Preferences > Printers & Scanners” in macOS.
- Select the printer you want to set as default.
- Right-click on the printer and select “Set as Default Printer”.
Table Comparing Default Printer Options
The following table compares the features and capabilities of different default printer options:
| Feature | Windows Default Printer | macOS Default Printer |
|---|---|---|
| Set as default for all applications | Yes | Yes |
| Set as default for specific applications | No | Yes |
| Automatic switching based on printer availability | No | Yes |
| Troubleshooting and support | Limited | Comprehensive |
Troubleshooting Multiple Default Printers
Common issues related to multiple default printers include:
- Printers not appearing in the list of available printers:Ensure that the printers are properly connected and turned on.
- Default printer not being used:Check if the default printer is set correctly in the printer settings.
- Printing errors:Verify that the printer is compatible with the document being printed and that the printer drivers are up to date.
Resources for Further Research
Security Considerations When Setting Default Printer
:max_bytes(150000):strip_icc()/Bluetoothannotated-4b0730141a334c2487f255faa3fcfc85.jpg "Default printer windows set cannot fix")
Setting the default printer involves granting access to a system resource, which raises security concerns. Unauthorized access to printer settings can compromise sensitive information, disrupt operations, and create security vulnerabilities. Understanding these risks and implementing appropriate security measures is crucial for protecting default printer settings.
Security Risks Associated with Default Printer Settings
- Unauthorized Access:Default printer settings can be exploited by unauthorized users to access sensitive documents, print malicious content, or disrupt printer functionality.
- Data Leakage:Sensitive information printed on the default printer can be intercepted or stolen, leading to data breaches.
- Malware Infection:Malicious software can target default printer settings to spread malware or launch cyberattacks.
Best Practices for Managing Printer Access and Permissions
To mitigate security risks, it’s essential to implement best practices for managing printer access and permissions:
- Restrict Access:Limit access to default printer settings to authorized users only, using password protection or access control lists.
- Use Secure Printing:Implement secure printing features, such as PIN codes or job encryption, to prevent unauthorized access to printed documents.
- Regularly Review Permissions:Periodically review and update printer permissions to ensure they remain appropriate and aligned with business needs.
Security Recommendations for Setting Default Printers
| Recommendation | Description |
|---|---|
| Use Strong Passwords: | Set strong passwords for printer accounts and access controls to prevent unauthorized access. |
| Enable Firewall and IDS: | Implement a firewall and intrusion detection system to monitor and block suspicious network traffic related to printer settings. |
| Regular Security Audits: | Conduct regular security audits to identify and address vulnerabilities in printer settings. |
| Update Printer Firmware: | Keep printer firmware up-to-date to patch security vulnerabilities and improve printer security. |
Potential Security Vulnerabilities and Mitigations
- Default Passwords:Using default passwords for printer accounts can be exploited by attackers. Mitigate this by setting strong, unique passwords.
- Unencrypted Network Connections:Printers connected over unencrypted networks can be vulnerable to eavesdropping. Use encrypted network protocols to protect printer data.
- Malware Attacks:Malware can exploit vulnerabilities in printer firmware to compromise settings. Keep firmware updated and implement anti-malware measures.
Importance of Regular Security Audits and Updates
Regular security audits and updates are crucial for maintaining the security of default printer settings. Audits identify vulnerabilities, while updates patch security flaws and improve printer protection.
Checklist for Securing Default Printer Settings
- Use strong passwords for printer accounts.
- Enable firewall and intrusion detection system.
- Conduct regular security audits.
- Update printer firmware regularly.
- Restrict access to authorized users.
- Implement secure printing features.
- Review permissions periodically.
Advanced Techniques for Setting Default Printer

Beyond the basic methods, advanced techniques offer greater control and customization for setting the default printer. These techniques involve using custom scripts, PowerShell commands, and group policies to configure default printer settings.
Custom scripts and PowerShell commands provide flexibility in automating the process of setting the default printer. For instance, a script can be created to set the default printer based on specific criteria, such as the user’s location or the type of print job.
Setting Default Printer for Specific Users or Groups
Group policies allow administrators to set the default printer for specific users or groups within an organization. This is useful in managed environments where consistent printer settings are required across multiple devices.
- In Active Directory, create a new Group Policy Object (GPO) and link it to the appropriate organizational unit.
- Within the GPO, navigate to Computer Configuration > Preferences > Control Panel Settings > Printers.
- Right-click and select “New” > “Printer”.
- Specify the printer name and set it as the default printer.
Setting Default Printer for Specific Print Jobs
In certain scenarios, it may be necessary to set the default printer for specific print jobs. This can be achieved using the “PrinterName” property in the print job settings.
- Open the document to be printed.
- Go to the print options or settings.
- In the “Printer” section, select the desired printer from the drop-down list.
- Click “OK” or “Print” to send the job to the specified printer.
Troubleshooting Common Problems
If the default printer is not working as expected, there may be underlying issues that need to be addressed.
- Check if the printer is properly connected and powered on.
- Verify that the printer drivers are installed and up to date.
- Ensure that the user has the necessary permissions to print to the desired printer.
- If using a network printer, check the network connectivity and firewall settings.
- Restart the print spooler service to resolve any temporary glitches.
– Explain the principles of user-friendly interface design.: How To Set The Default Printer
User-friendly interface design is an approach to creating interfaces that are easy to use and understand. It involves considering the user’s needs, goals, and cognitive abilities to ensure that the interface is intuitive and accessible.
Some of the key principles of user-friendly interface design include:
- Consistency:The interface should be consistent throughout, using similar design elements and navigation patterns.
- Clarity:The interface should be clear and concise, using simple language and avoiding jargon.
- Feedback:The interface should provide feedback to users on their actions, such as confirmation messages or error messages.
- Affordance:The interface should use affordances to indicate how it can be used, such as buttons that look like they can be clicked.
- Accessibility:The interface should be accessible to users with disabilities, such as providing alternative text for images and closed captions for videos.
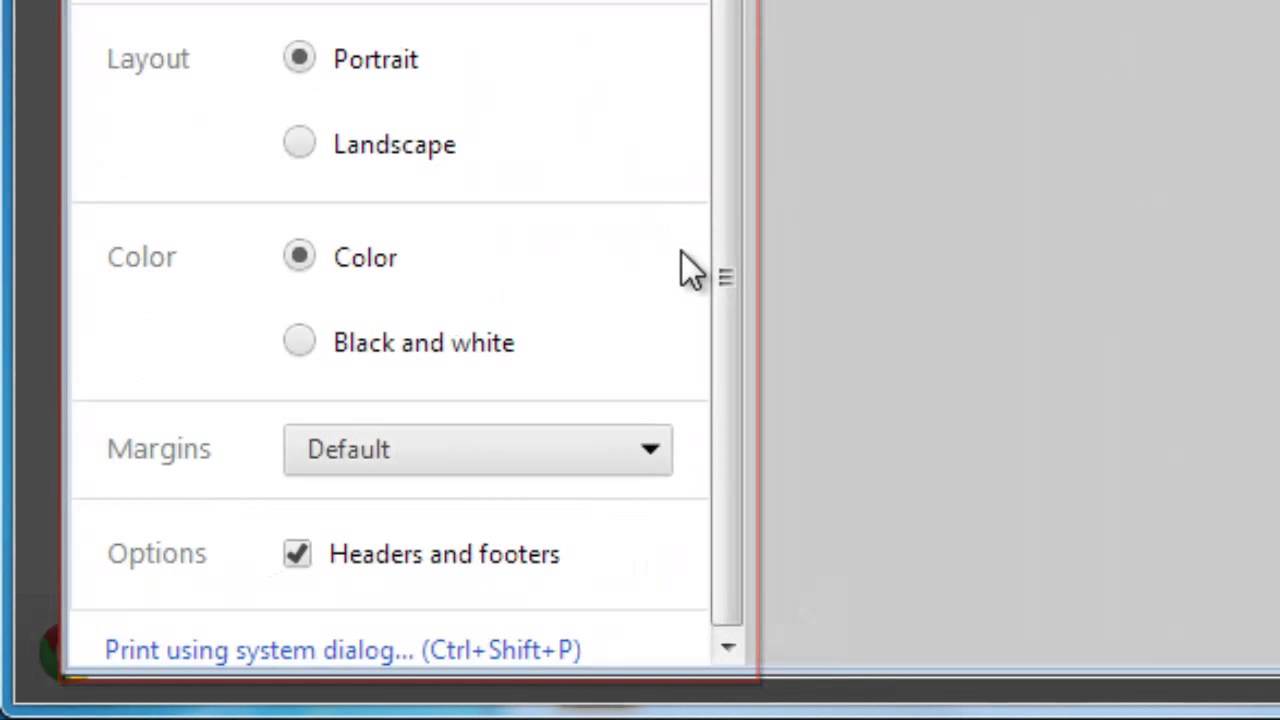
Optimizing Default Printer Settings for Efficiency
Optimizing default printer settings can significantly improve printing efficiency, reduce costs, and enhance print quality. By adjusting various settings, users can optimize their printing experience based on their specific needs and preferences.
Reducing Printing Costs
* Paper Size:Selecting smaller paper sizes (e.g., A5 instead of A4) can reduce paper waste.
Duplex Printing
Printing on both sides of the paper can save paper consumption by up to 50%.
Print Quality
Lower print quality settings (e.g., draft mode) can reduce ink usage.
Improving Print Quality
* Paper Quality:Using high-quality paper can improve print sharpness and prevent smudging.
Print Quality
Higher print quality settings (e.g., high resolution) produce sharper and more detailed prints.
Color Printing
Color printing can enhance visual appeal but may increase ink usage.
Troubleshooting Common Printing Problems
* Printer Not Responding:Check if the printer is turned on and connected properly.
Paper Jams
Remove any jammed paper gently, avoiding tearing.
Poor Print Quality
Clean the printer heads, check ink levels, and ensure the correct paper type is used.
Ink Smudging
Allow prints to dry completely before handling.
Resources for Further Reading
* [HP Printer Optimization Guide](https://support.hp.com/us-en/document/c03558143)
[Brother Printer Optimization Guide](https
//www.brother-usa.com/support/faqs/article/ptg111151)
[Epson Printer Optimization Guide](https
//epson.com/Support/wa00730)
Best Practices for Default Printer Management

Effective management of default printers in an enterprise environment is crucial for maintaining efficiency and ensuring seamless printing operations. Implementing best practices helps organizations streamline printer management, reduce costs, and enhance productivity.
Centralized control and monitoring are essential aspects of best practice printer management. A centralized print server or management software allows administrators to manage all printers from a single location. This enables efficient printer configuration, driver updates, and remote troubleshooting, minimizing downtime and improving overall printer availability.
Monitoring and Auditing
Regular monitoring and auditing of printer usage helps identify potential issues and optimize printing processes. Monitoring tools provide insights into printer activity, including usage patterns, toner levels, and error logs. This information can be used to identify printers that require maintenance or replacement, preventing unexpected downtime and ensuring uninterrupted printing.
Security Considerations
Security is paramount in printer management. Default printers should be configured with appropriate security measures to prevent unauthorized access and protect sensitive data. This includes implementing strong passwords, enabling encryption, and restricting printer access to authorized users only.
Cost Optimization
Effective printer management can contribute to cost optimization. By implementing print quotas and duplex printing, organizations can reduce paper consumption and toner usage. Additionally, regular maintenance and timely replacement of consumables help extend printer lifespans, minimizing replacement costs.
Future Trends in Default Printer Technology

The realm of default printer technology is poised for transformative advancements in the years to come. As the world embraces digitalization and mobile connectivity, the role of default printers is evolving to meet the changing needs of users.
Cloud Printing
Cloud printing has emerged as a game-changer, allowing users to print documents from any location with an internet connection. By leveraging cloud-based services, users can access printers remotely, eliminating the need for physical connections or local drivers. This paradigm shift enhances convenience and flexibility, empowering users to print from multiple devices, including laptops, smartphones, and tablets.
Mobile Printing
The proliferation of mobile devices has fueled the demand for mobile printing capabilities. Modern default printers are equipped with features that enable seamless printing from smartphones and tablets. Through wireless connectivity options such as Wi-Fi Direct, Bluetooth, and NFC, users can print documents directly from their mobile devices without the need for a computer intermediary.
This enhanced mobility empowers users to print on the go, facilitating productivity and convenience.
FAQs
How do I identify my default printer?
To identify your default printer, navigate to the Printers & Scanners section in your computer’s settings. The printer marked as “Default” is your currently selected default printer.
How do I change my default printer in Windows?
In Windows, open the Settings app, select “Devices,” then “Printers & Scanners.” Click on the printer you want to set as default and select “Set as default.”
How do I troubleshoot printing problems?
If you encounter printing issues, check if the printer is turned on and connected properly. Ensure that the correct printer driver is installed and updated. If the problem persists, try restarting the printer and your computer.


