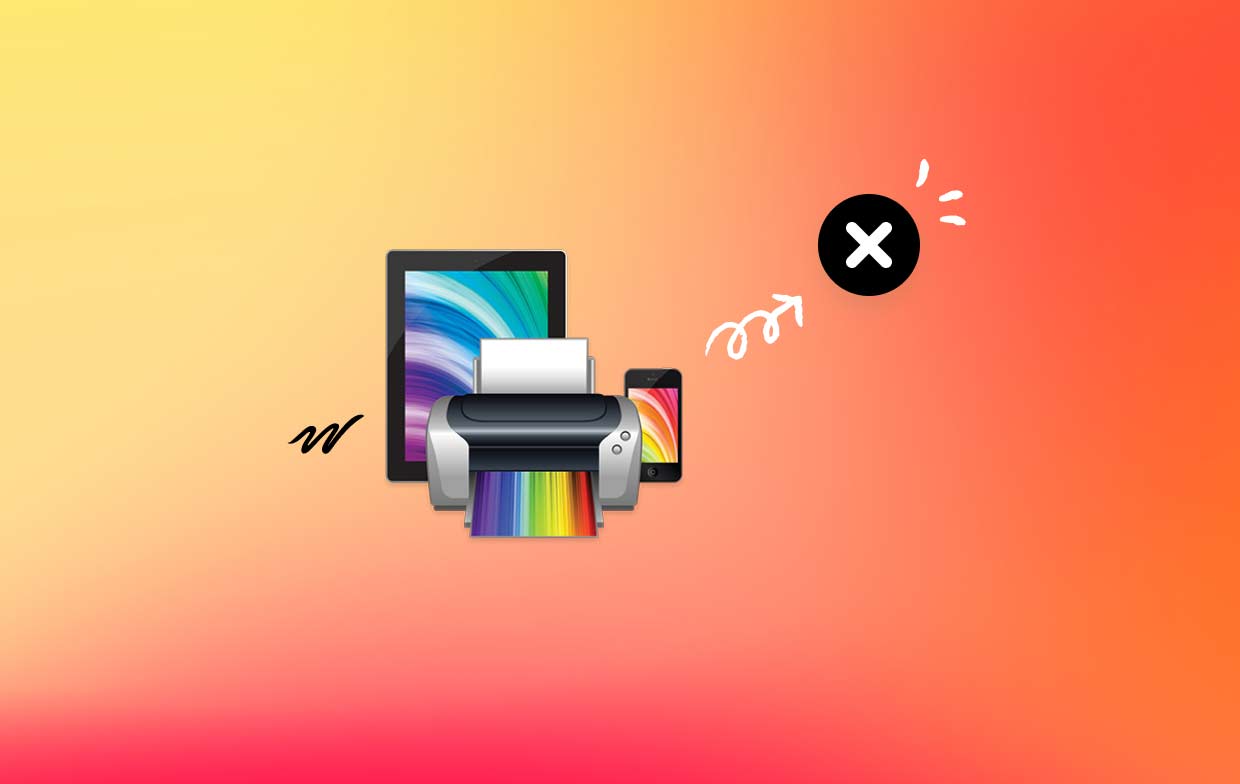
How do you uninstall a printer on a mac – Uninstalling a printer on a Mac can be a straightforward process, but there are a few steps you need to follow to ensure a successful removal. This guide will provide you with detailed instructions on how to uninstall different types of printers, including AirPrint, USB, and Wi-Fi printers, using various methods such as the System Preferences menu and Terminal commands.
Identifying Printer Types

Printers are classified into various types based on their connectivity and functionality. Understanding the type of printer connected to your Mac is crucial for efficient setup and troubleshooting.
The most common types of printers include:
- AirPrint Printers:Wireless printers that connect directly to your Mac over a Wi-Fi network, without the need for cables or additional software.
- USB Printers:Printers that connect to your Mac via a USB cable, providing a direct and stable connection.
- Wi-Fi Printers:Printers that connect to your Mac wirelessly through a Wi-Fi network, but require additional software or drivers for setup.
Identifying Printer Type
To identify the type of printer connected to your Mac:
- Go to the Apple menu and select “System Preferences.”
- Click on “Printers & Scanners.”
- In the left-hand panel, select the printer you want to identify.
- The “Kind” column will indicate the type of printer (e.g., AirPrint, USB, or Wi-Fi).
| Printer Type | Connection Method |
|---|---|
| AirPrint | Wi-Fi |
| USB | USB cable |
| Wi-Fi | Wi-Fi network |
Uninstalling AirPrint Printers
Uninstalling AirPrint printers from a Mac involves a few simple steps. This guide provides detailed instructions and addresses potential issues that may arise during the process.
Removing AirPrint Printers
- Open System Preferences from the Apple menu.
- Select “Printers & Scanners.”
- Highlight the AirPrint printer you want to remove.
- Click the minus (-) button below the printer list.
- Confirm the removal by clicking “Remove.”
Potential Issues and Solutions
In some cases, you may encounter issues while uninstalling AirPrint printers. Here are some potential problems and their solutions:
- Printer not listed:If the AirPrint printer is not visible in the Printers & Scanners list, check if it is connected to the same Wi-Fi network as your Mac. Additionally, ensure that the printer is turned on and has AirPrint enabled.
- Unable to remove printer:If you are unable to remove an AirPrint printer, it may be because it is the default printer. To resolve this, select a different printer as the default before attempting to remove the AirPrint printer.
Uninstalling USB Printers

Uninstalling USB printers involves removing both the physical connection and the associated software drivers from your computer. The steps for uninstalling USB printers vary slightly depending on your operating system.
Windows 10 and 11
To uninstall a USB printer on Windows 10 or 11, follow these steps:
- Disconnect the USB cable from the printer.
- Open the “Settings” app.
- Go to “Devices” > “Printers & scanners”.
- Select the printer you want to uninstall and click on “Remove device”.
- Confirm the uninstallation by clicking on “Yes”.
You can also use the Device Manager to uninstall printer drivers:
- Open the “Device Manager” by searching for it in the Windows search bar.
- Expand the “Print queues” category.
- Right-click on the printer driver you want to uninstall and select “Uninstall device”.
- Confirm the uninstallation by clicking on “Yes”.
macOS
To uninstall a USB printer on macOS, follow these steps:
- Disconnect the USB cable from the printer.
- Open the “System Preferences” menu.
- Click on “Printers & Scanners”.
- Select the printer you want to uninstall and click on the “-” button at the bottom of the window.
- Confirm the uninstallation by clicking on “Delete”.
Manually Deleting Printer-Related Files and Registry Entries
In some cases, you may need to manually delete printer-related files and registry entries to completely uninstall a printer. This is especially true if you are having trouble uninstalling the printer using the standard methods described above.
To manually delete printer-related files and registry entries, follow these steps:
- Open the “Registry Editor” by searching for it in the Windows search bar.
- Navigate to the following registry key: HKEY_LOCAL_MACHINE\SYSTEM\CurrentControlSet\Control\Print\Printers
- Delete the subkey for the printer you want to uninstall.
- Open the “File Explorer” and navigate to the following folder: C:\Windows\System32\spool\PRINTERS
- Delete the folder for the printer you want to uninstall.
Troubleshooting Tips
If you are having trouble uninstalling a printer, try the following troubleshooting tips:
- Make sure that the printer is turned off and disconnected from your computer.
- Restart your computer.
- Try using a different USB cable.
- Update your printer drivers.
- Contact the manufacturer of your printer for support.
Uninstalling Wi-Fi Printers
Uninstalling Wi-Fi printers from a Mac involves removing the printer from the system preferences and deleting any associated network configurations.
Here are the steps for uninstalling Wi-Fi printers:
Removing the Printer from System Preferences
- Click on the Apple menu and select “System Preferences.”
- Select “Printers & Scanners” from the System Preferences window.
- Select the Wi-Fi printer you want to remove and click on the minus (-) button at the bottom of the list.
- Click on “Delete Printer” to confirm the removal.
Deleting Network Configurations
After removing the printer from System Preferences, you may need to delete any associated network configurations. To do this:
- Click on the Apple menu and select “System Preferences.”
- Select “Network” from the System Preferences window.
- Select “Wi-Fi” from the sidebar and then click on the “Advanced” button.
- Select the “TCP/IP” tab and then click on the “Renew DHCP Lease” button.
- Click on the “OK” button to save the changes.
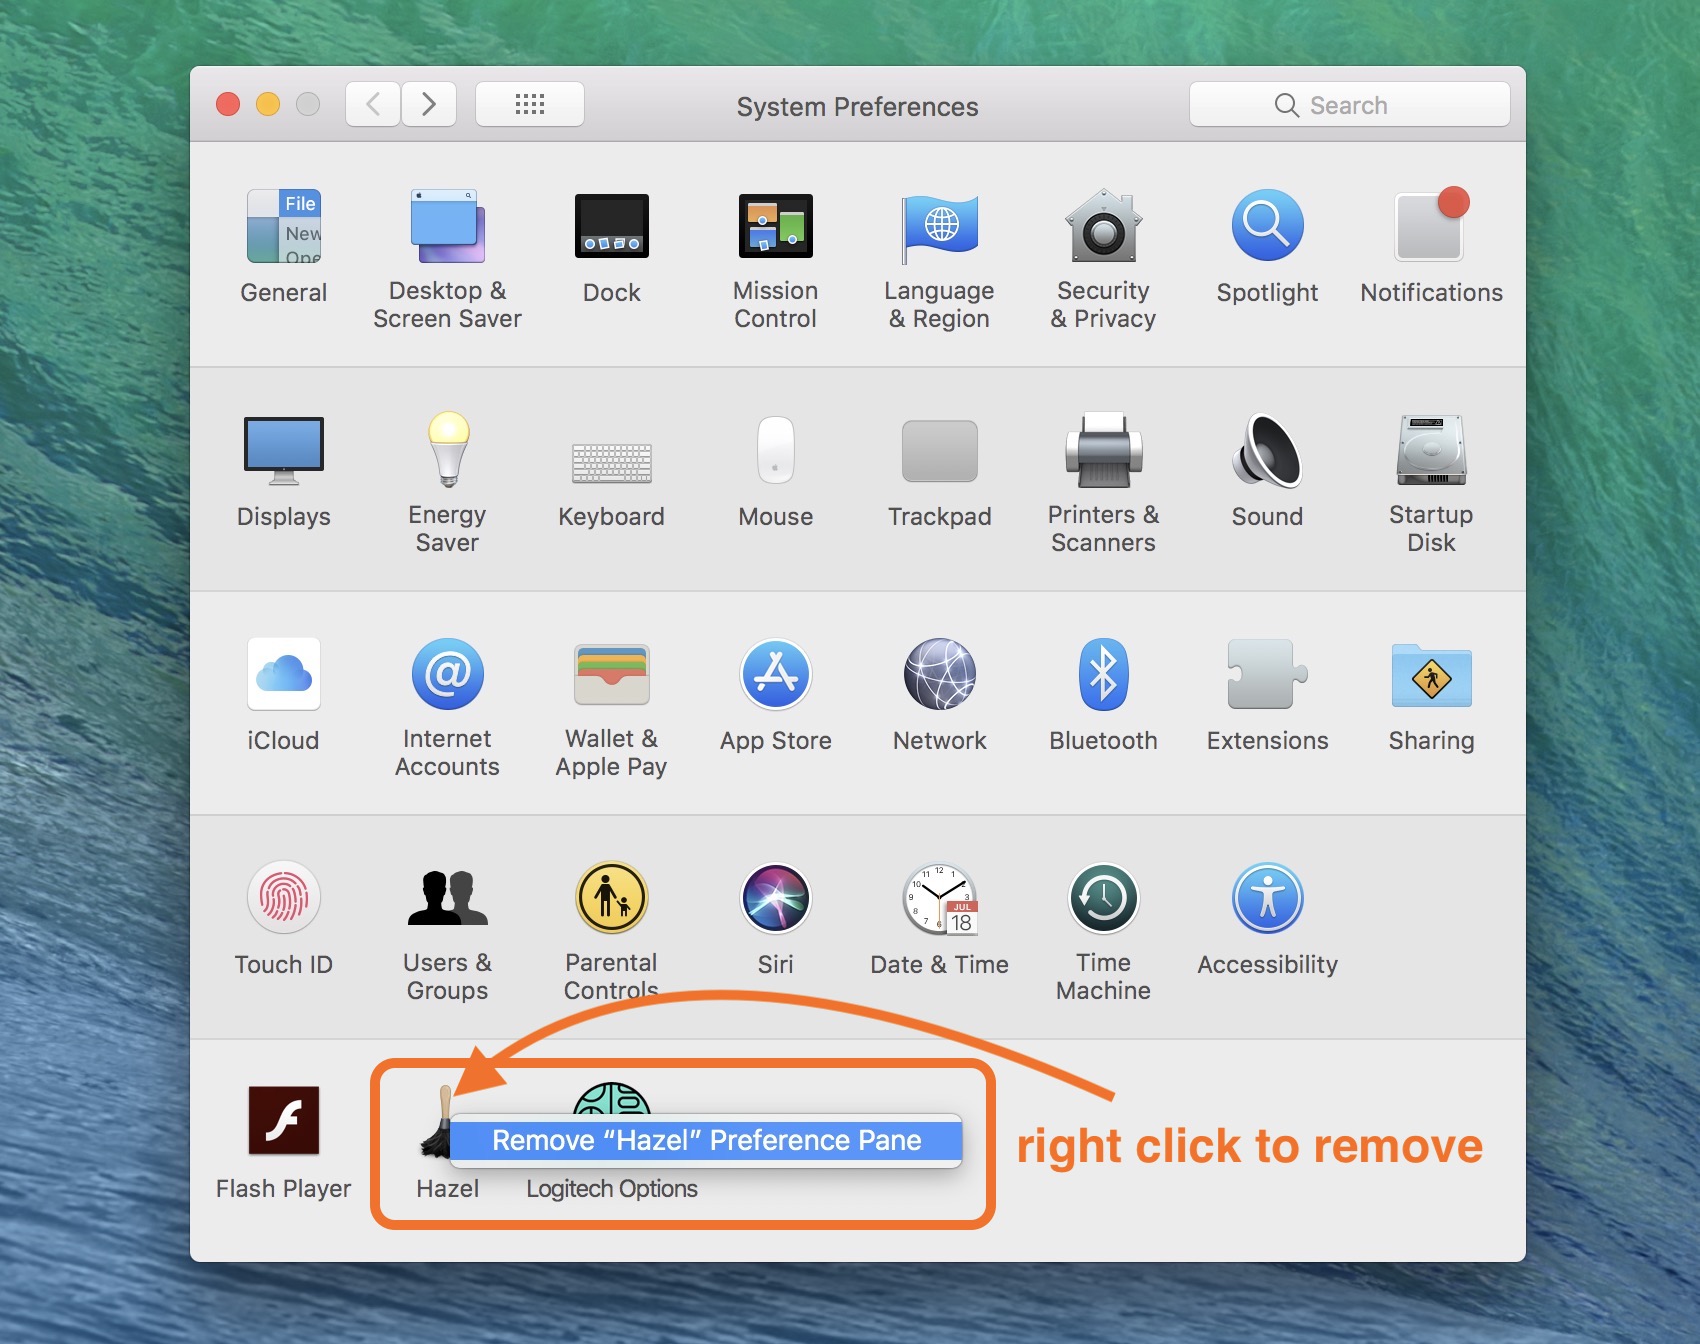
Using the System Preferences Menu
The System Preferences menu offers a user-friendly interface to manage installed printers on a Mac. It provides a comprehensive list of printers, including AirPrint, USB, and Wi-Fi printers, allowing users to easily uninstall them with a few simple steps.
To uninstall a printer using the System Preferences menu, follow these steps:
Navigating the Menu
- Click on the Apple menu located in the top-left corner of the screen.
- Select “System Preferences” from the drop-down menu.
- Locate and click on the “Printers & Scanners” icon.
Selecting and Removing the Printer
- In the Printers & Scanners window, a list of installed printers will be displayed.
- Select the printer you wish to uninstall by clicking on its name.
- Click on the minus (-) button located at the bottom of the window.
- Confirm the deletion by clicking on the “Delete” button in the pop-up dialog box.
Common Issues and Solutions
While uninstalling printers through the System Preferences menu is generally straightforward, users may encounter certain issues. Here are some common problems and their corresponding solutions:
- Printer not listed:If the printer you want to uninstall is not visible in the Printers & Scanners window, ensure that it is properly connected to your Mac and powered on.
- Unable to delete printer:If you encounter an error message stating that the printer cannot be deleted, check if the printer is currently in use by any applications. Close any open documents or programs that may be using the printer and try uninstalling again.
- Printer reappears after deletion:In some cases, a printer may reappear in the Printers & Scanners window even after being uninstalled. This can be resolved by restarting your Mac or resetting the printing system.
Summary
Uninstalling printers using the System Preferences menu on a Mac is a simple and efficient process. By following the steps Artikeld above, users can easily remove unwanted or unused printers from their system. The menu provides a clear and organized interface, making it convenient to manage installed printers and maintain a clean and efficient printing environment.
Utilizing Terminal s

Terminal provides a command-line interface for managing system tasks, including printer management. Here’s how to uninstall printers using Terminal:
Open Terminal by pressing Command + Space, typing “Terminal”, and hitting Enter. To list all installed printers, run the following command:
lpstat
-p
Identify the name of the printer you want to remove. Then, use the following command to uninstall it:
lpadmin
-x printer_name
Replace “printer_name” with the actual name of the printer.
Specific s for Different Types of Printers
While the general command remains the same, specific s may vary depending on the printer type:
- AirPrint Printers:Use the command “lpadmin -x printer_name” to remove AirPrint printers.
- USB Printers:Unplug the USB printer before running the command “lpadmin -x printer_name”.
- Wi-Fi Printers:Disconnect the Wi-Fi printer from the network before running the command “lpadmin -x printer_name”.
Identifying Printer Names

Identifying the names of installed printers is crucial before proceeding with the uninstallation process. There are several methods to accomplish this:
Using the “lpstatp” Command
p” Command
In the Terminal, execute the “lpstat -p” command to display a list of all installed printers and their corresponding names. This command provides detailed information about each printer, including its status, queue, and device URI.
Removing Printer Drivers: How Do You Uninstall A Printer On A Mac
Removing printer drivers from a Mac is essential when troubleshooting printing issues or when you no longer need a particular printer. Here’s how to remove printer drivers from a Mac:
Open Terminal and enter the following command:
“`bashpkgutil
Before you uninstall a printer on your Mac, consider if you need to retain its drivers for potential future use. If you frequent a public library and require printing services, check their printing policies. Some libraries may require a library card for printing, as outlined in this article.
Returning to the topic of uninstalling a printer on a Mac, follow these steps to remove it from your system.
-forget [package name]
“`
Replace [package name] with the name of the printer driver package you want to remove. You can find the package name by running the following command:
“`bashpkgutil
-pkgs | grep printer
“`
This will list all installed printer driver packages. Once you have identified the package name, you can remove it using the pkgutil command.
Table of Printer Driver Types and Removal Commands
Here’s a table that lists the different printer driver types and the corresponding commands to remove them:
| Printer Driver Type | Removal Command |
|---|---|
| AirPrint | pkgutil |
| Bonjour | pkgutil |
| CUPS | pkgutil |
| HP | pkgutil |
| Canon | pkgutil |
Troubleshooting Tips:
If you encounter any difficulties when uninstalling a printer on a Mac, consider checking the manufacturer’s website for specific instructions. Alternatively, you may find it helpful to learn how to change toner on a Brother printer. For detailed guidance, refer to this informative article: how to change toner on a brother printer.
Once you have successfully addressed any printer-related issues, you can proceed with the uninstallation process on your Mac.
- If you’re having trouble removing a printer driver, try restarting your Mac.
- If the pkgutil command doesn’t work, you can try manually removing the printer driver files from the following directory:
- /Library/Printers/PPDs
Troubleshooting Uninstall Issues
Uninstalling printers on a Mac is generally straightforward, but occasionally users may encounter issues. Here are some common problems and their solutions:
Incorrect Printer Selection
If you attempt to uninstall a printer that is not currently connected to your Mac, you may encounter an error message. Ensure that the printer you wish to uninstall is properly connected before proceeding.
Background Processes Interfering
Certain background processes or applications may prevent the successful uninstallation of a printer. Quit any running applications that may be using the printer, such as print spooler or printer management software.
File Permissions Issues
If you encounter permission errors during uninstallation, you may need to grant your user account administrative privileges. To do this, open System Preferences > Security & Privacy > Privacy > Full Disk Access and add your user account to the list of authorized users.
Residual Printer Files
After uninstalling a printer, there may be residual files or preferences associated with it. These can be manually removed by navigating to the following directories and deleting any related files:
“`~/Library/Printers/Library/Printers/System/Library/Printers“`
Verifying Uninstall Success
After performing the uninstall procedures, it is crucial to verify that the printer has been successfully removed from your system. This ensures that no residual files or processes remain, potentially causing issues or conflicts in the future.
There are several methods to verify the successful uninstallation of a printer:
Checking System Preferences
Navigate to System Preferences> Printers & Scanners. If the printer you uninstalled is no longer listed, it has been successfully removed.
Inspecting Printer Queue
Open the Print Queueby clicking on the printer icon in the menu bar or navigating to Applications> Utilities> Print Queue. If the printer you uninstalled is not present in the list, it has been successfully removed.
Searching for Residual Files
Use the Finderto search for any remaining files or folders associated with the uninstalled printer. If you find any, delete them.
Monitoring System Processes
Open Activity Monitor(located in Applications> Utilities) and search for any processes related to the uninstalled printer. If you find any, quit them.
Restarting the System
Restarting your Mac can help ensure that all residual processes or files associated with the uninstalled printer are completely removed.
Organizing Uninstall Procedures
It is crucial to follow the correct procedures when uninstalling printers on a Mac to avoid potential issues. Different types of printers may require different methods for uninstallation. The table below Artikels the steps for uninstalling various printer types, including AirPrint, USB, and Wi-Fi printers.
Uninstall Procedure Table
| Printer Type | Uninstall Method | Potential Issues | Additional Notes |
|---|---|---|---|
| AirPrint | System Preferences | None | AirPrint printers are automatically removed when the Mac is disconnected from the network. |
| USB | System Preferences or Terminal | Driver conflicts | Ensure that the printer is disconnected from the Mac before uninstalling. |
| Wi-Fi | System Preferences or Terminal | Network configuration issues | Make sure that the printer is turned on and connected to the same network as the Mac. |
By following the correct uninstall procedures, you can ensure that the printer drivers and associated files are properly removed from your Mac, minimizing the risk of potential issues. Failure to do so may lead to driver conflicts, network configuration problems, or other errors that can affect the performance of your Mac or the functionality of other printers connected to the system.
Designing a Comprehensive Uninstall Guide
Creating a comprehensive uninstall guide is crucial for ensuring a seamless and effective uninstallation process. It should provide clear and concise instructions, accompanied by visual aids and troubleshooting sections, to guide users through the process effortlessly.
Structure of a Comprehensive Uninstall Guide, How do you uninstall a printer on a mac
A comprehensive uninstall guide typically consists of the following sections:
- Introduction:A brief overview of the guide’s purpose and scope.
- Prerequisites:Any necessary preparations or requirements before starting the uninstallation.
- Step-by-Step Instructions:Detailed instructions on how to uninstall the software or application.
- Troubleshooting:A section dedicated to resolving common issues that may arise during the uninstallation process.
- Verification:Instructions on how to verify that the software or application has been successfully uninstalled.
Incorporating Screenshots, Tables, and Troubleshooting Sections
Visual aids such as screenshots and tables can greatly enhance the clarity of an uninstall guide. Screenshots can illustrate specific steps, while tables can summarize key information or provide comparisons. Troubleshooting sections should include specific error messages and their corresponding solutions.
Examples of Effective Uninstall Guide Formats
Effective uninstall guide formats include:
- Step-by-step with screenshots:Each step is accompanied by a screenshot, making it easy to follow the instructions.
- Table-based comparison:A table comparing different methods of uninstalling the software, highlighting their advantages and disadvantages.
- Interactive troubleshooting:A troubleshooting section that uses a decision tree or flowchart to guide users through potential issues.
Tools and Resources for Creating Uninstall Guides
Various tools and resources are available for creating uninstall guides:
- Documentation generators:Tools like Sphinx and Doxygen can automatically generate documentation from source code.
- Screenshot capture tools:Tools like Snagit and Lightshot can capture screenshots for use in the guide.
- Version control systems:Systems like Git and Subversion allow for easy collaboration and version tracking of the guide.
Best Practices for Writing Clear and Concise Uninstall Guides
Best practices for writing clear and concise uninstall guides include:
- Use simple and straightforward language:Avoid technical jargon and use language that is easily understandable by users.
- Provide clear and specific instructions:Each step should be detailed and unambiguous.
- Test the guide thoroughly:Ensure that the instructions are accurate and effective before publishing the guide.
Testing and Verifying Uninstall Guides
Testing and verifying uninstall guides is essential to ensure their accuracy and effectiveness. This can be done by:
- Performing the uninstallation process yourself:Follow the instructions in the guide and verify that the software or application is successfully uninstalled.
- Getting feedback from users:Collect feedback from users who have used the guide to identify any areas for improvement.
By following these guidelines, you can create comprehensive uninstall guides that will help users effortlessly remove software or applications from their systems.
Creating a Visual Guide
Visual guides can enhance the clarity and accessibility of uninstalling printers on Macs. They provide a step-by-step visual representation of the process, making it easier for users to follow and understand.
To create an effective visual guide, consider using images, diagrams, and screenshots. These elements can illustrate the steps involved, highlight key actions, and provide a clear understanding of the process flow.
Using Images and Diagrams
- Use high-quality images that clearly depict the steps involved in uninstalling the printer.
- Include diagrams to illustrate the connections and relationships between different components, such as the printer, computer, and network.
- Label images and diagrams with descriptive text to provide additional context and clarity.
Using Screenshots
- Include screenshots of the actual steps involved in uninstalling the printer.
- Highlight important actions and settings using arrows, circles, or other visual cues.
- Annotate screenshots with brief explanations to guide users through the process.
Using HTML Tables for Content Structure
HTML tables provide a structured and organized way to present information. They can be used to create uninstall guides that are easy to follow and understand.
Creating an Uninstall Guide Using HTML Tables
To create an uninstall guide using HTML tables, follow these steps:
- Create a new HTML file.
- Add the following code to the head section of the file:
- Add the following code to the body section of the file:
<style> table border-collapse: collapse; width: 100%; th, td border: 1px solid black; padding: 5px; </style>
<table>
Step Instruction Notes 1 Open the System Preferences menu. 2 Click on the Printers & Scanners icon. 3 Select the printer you want to uninstall. 4 Click on the minus (-) button. 5 Click on the Delete button. </table>
This code will create a table with three columns: Step, Instruction, and Notes. The first column will contain the steps required to uninstall the printer, the second column will contain the instructions for each step, and the third column will contain any additional notes or information.
You can customize the table to fit your specific needs. For example, you can add additional columns for troubleshooting tips or screenshots.
– Discuss best practices for writing clear and concise uninstall s

Writing clear and concise uninstall instructions is essential for ensuring that users can successfully remove software from their computers without encountering any issues. Here are some best practices to follow when writing uninstall instructions:
1. Use clear and concise language.Avoid using technical jargon or acronyms that may not be familiar to all users. Write in a simple and straightforward manner, using language that is easy to understand.
2. Use headings and subheadings to organize your instructions.This will make your instructions easier to read and follow. Headings should be descriptive and concise, and should accurately reflect the content of the section they introduce.
3. Use bullet points to list steps.This will make your instructions easier to follow and will help users to quickly identify the steps they need to take.
4. Provide screenshots or illustrations to help users visualize the steps.This can be especially helpful for users who are not familiar with the software they are uninstalling.
5. Test your instructions before publishing them.This will help you to identify any errors or ambiguities in your instructions. Ask a friend or colleague to follow your instructions and provide feedback.
Key Questions Answered
How do I uninstall an AirPrint printer?
To uninstall an AirPrint printer, go to System Preferences > Printers & Scanners, select the printer, and click the minus (-) button.
How do I uninstall a USB printer?
To uninstall a USB printer, go to System Preferences > Printers & Scanners, select the printer, and click the minus (-) button. Then, unplug the USB cable from your Mac.
How do I uninstall a Wi-Fi printer?
To uninstall a Wi-Fi printer, go to System Preferences > Printers & Scanners, select the printer, and click the minus (-) button. Then, go to Network > Wi-Fi, select the printer’s network, and click the minus (-) button.


